As an Amazon Associate, we earn from qualifying purchases. Some links on this site are affiliate links at no extra cost to you. Our recommendations are based on thorough research and editorial judgment.

How To Set Up A Complete Home Recording Studio?
To set up a complete home recording studio, we should start by selecting a larger room with good acoustics, ideally following the Golden Mean dimensions. Next, we need essential equipment like large-diaphragm condenser mics for vocals and studio monitors for accurate mixing. After connecting our audio interface, we’ll optimize monitoring with closed-back headphones and proper speaker placement. Finally, we must establish efficient backup strategies to protect our projects. There’s much more we can explore to enhance our setup!
Key Takeaways
- Choose an ideal room size that follows the Golden Mean, ensuring proper sound isolation and acoustic treatment for clarity.
- Invest in essential equipment like large-diaphragm condenser mics, studio monitors, and closed-back headphones for quality recording and mixing.
- Set up and connect your audio interface correctly, making sure to install necessary drivers for optimal performance.
- Implement a robust backup strategy following the 3-2-1 rule for data security and project management.
- Plan for future infrastructure upgrades, ensuring your studio can accommodate evolving technology and increased equipment needs.
Choosing the Right Room
You may be interested

When we’re setting up our home recording studio, selecting the right room is essential for achieving the best sound quality possible. Ideally, we want a larger space, ideally with dimensions following the Greek Golden Mean—like 8 ft high, 13 ft wide, and 21 ft long. This layout allows sound to travel and settle nicely. We should also focus on sound isolation; rooms far from noise—like basements or attics—are fantastic options. Once we find our space, we can perform a quick room evaluation, like clapping hands, to identify ambient sound. Acoustic treatment will be necessary to minimize unwanted reflections, improving sound clarity. Remember, a room’s ceiling height can impact microphone placement and overall sound quality immensely. Additionally, incorporating Acoustic treatment can significantly enhance recording quality by reducing echo and improving clarity.
Essential Equipment for Your Studio

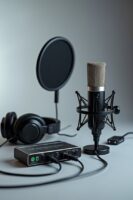
Setting up a home recording studio requires several key pieces of equipment that form the backbone of your creative process. First up, let’s talk about microphone types. Large-diaphragm condenser mics are fantastic for capturing vocals and acoustic instruments, while dynamic mics like the Shure SM57 handle louder sources like guitar amps with ease. For headphone selection, we recommend closed-back headphones for tracking to minimize sound bleed and open-back options for mixing to enhance sound accuracy.
Don’t forget about studio monitors! Choosing flat-response monitors helps create the best mixes. Finally, adding microphone stands and pop filters will improve your recording quality. With this essential gear, we’re well on our way to making great music in our studios! Additionally, consider incorporating a quality amplifier, such as the FBA-10 Mini, to enhance your acoustic sound during recordings.
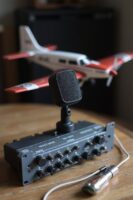
Setting Up Your Audio Interface

With our essential equipment in place, it’s time to tackle our audio interface, the heart of our recording setup. First, we connect it to our computer using either USB or Thunderbolt cables. Let’s make certain it powers on by checking the status lights. If it needs external power, we’ll plug it in and confirm the connection.
Next, we need to handle driver installation. Visiting the manufacturer’s website for the latest drivers is vital; once installed, a quick computer restart will finalize our setup. After verifying that the interface appears in our system sound settings, we can focus on our input connections. Connecting microphones with XLR cables guarantees quality, while TRS cables link our outputs to studio monitors for that professional sound. Furthermore, ensuring that our interface has multiple connectivity options will facilitate seamless integration with various audio sources.
Recommended Products

48 Input Channels, 36 Total Busses, PAFL Bus, 12 Stereo Mix (Aux or Group) + Main
Optimizing Monitoring and Headphone Use
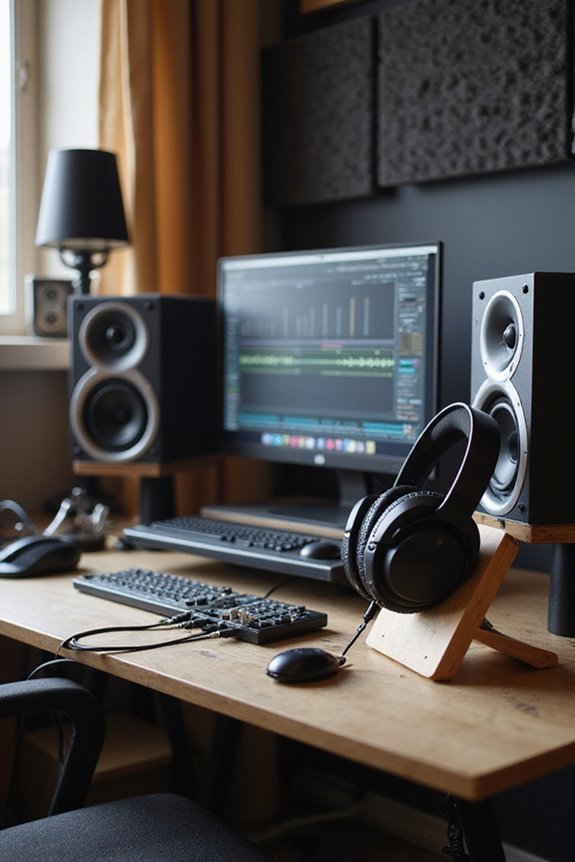
How can we maximize our monitoring experience in a home recording studio? First, let’s focus on monitor placement. Ideally, we should position our monitors at ear level, forming a 60° angle from our listening position while keeping them about one meter from walls. This setup minimizes unwanted reflections and enhances clarity.
Next, headphone calibration is vital. Using high-quality, closed-back headphones helps us maintain an accurate representation of our mixes. It’s wise to switch between monitors and headphones regularly to catch any balance issues. Don’t forget to calibrate our headphone levels to avoid ear strain. By integrating these techniques, we can guarantee our mixing translates well across different systems, leading to better overall sound quality in our recordings. Additionally, choosing studio monitors like the Yamaha HS3 can significantly improve the accuracy of our sound reproduction, making them an excellent choice for small studio environments.
Organizing Cables and Stands

Effective organization of cables and stands in our home recording studio can greatly enhance both functionality and aesthetics. We should start by evaluating our cable needs, measuring lengths carefully, and guaranteeing power cables are separate from audio lines. For efficient cable management, using cable sleeves or Velcro tabs helps keep everything neat.
Stand placement also plays a critical role—positioning microphone and instrument stands to minimize cable runs reduces clutter and interference. Let’s utilize built-in clips on our stands, anchoring cables for stability and a clean setup. Finally, keeping unused cables stored in dedicated containers guarantees we maintain organization and ease of access. By strategically grouping, bundling, and concealing our cables and stands, we create a professional and inspiring environment for creativity. Additionally, incorporating user-friendly designs can simplify the setup process and enhance overall functionality.
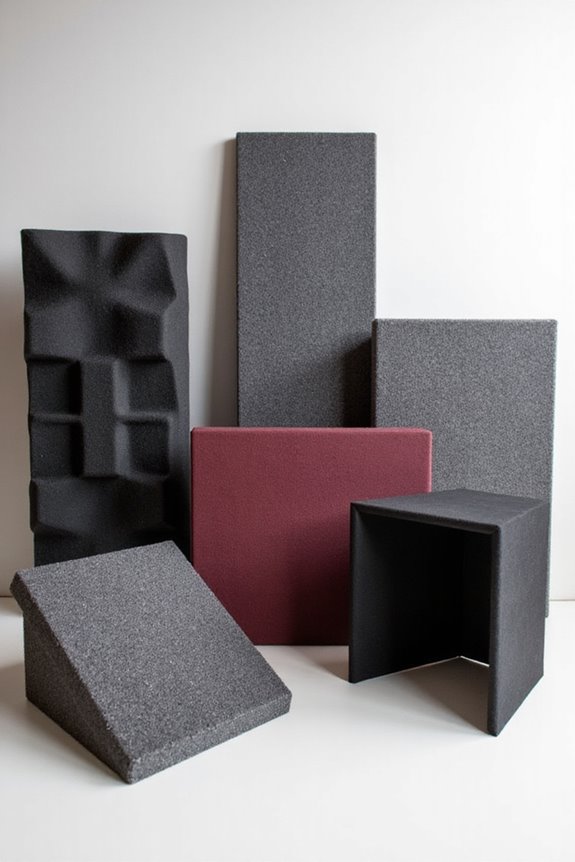
Implementing Acoustic Treatment
A well-treated recording space can profoundly elevate our audio quality, and the right acoustic treatment is indispensable for achieving that. To start, we should focus on bass trap placement, particularly in the corners where low frequencies tend to accumulate. Using thick, porous materials enhances absorption, helping us achieve a flatter frequency response. Next, we can address early reflection treatment by placing acoustic panels at the first reflection points on our side walls and ceiling. This minimizes unwanted echoes and improves clarity. By balancing absorption with diffusion, we maintain a lively sound. Remember, experimenting with the positioning of our bass traps and panels will lead to the best results tailored to our specific recording environment. Together, let’s refine our space!
Recommended Products
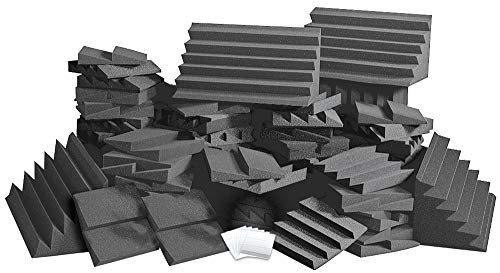

High NRC Rated Core .95 or higher avg.
Creating an Efficient Workflow
Implementing workflow automation can drastically reduce repetitive tasks. For instance, using DAW templates streamlines session setup, while assigning specific workblocks enhances focus. Arranging our workspace ergonomically keeps essential gear within reach, minimizing interruptions. By incorporating keyboard shortcuts and control surfaces, we can further boost our efficiency and keep our creative flow intact. With these strategies in place, we’ll find our productivity soaring!
Backup Strategies for Your Projects
When setting up your home recording studio, one of the most critical aspects to evaluate is how we back up our projects. A solid backup strategy starts with the 3-2-1 rule: keep three copies of your data on two different storage types, with one copy offsite. We also suggest using incremental naming to avoid overwriting important versions. To maintain data integrity, let’s make daily backups and store complete project folders on both local backups, like external drives, and in cloud solutions. These methods not only enhance redundancy but also allow for collaborative sharing. Regular restoration verification and archiving projects by documenting notes will make sure our work stays safe while keeping our creative flow uninterrupted.
Planning for Future Expansion
As we consider our home recording studio’s growth, it’s essential to approach the design and infrastructure with a forward-thinking mindset. Emphasizing modular design allows us to adapt as our needs evolve; we can easily add new recording rooms or upgrade equipment. Let’s not forget about sound isolation—planning for this from the start guarantees that future expansions maintain audio quality.
During construction, we should incorporate conduits for easy wiring upgrades and enhance our electrical infrastructure to support extra power outlets. By budgeting for these expansions and keeping an eye on market demand, we can strategically scale our studio while remaining adaptable to new technologies and client needs. This way, our creative space can grow harmoniously, inviting collaboration and innovation.
Frequently Asked Questions
What Is the Best Room Shape for a Recording Studio?
When it comes to room shape, we’ve found rectangular designs work best for studio layouts. They provide predictable room acoustics, making it easier to achieve a great sound while avoiding common pitfalls like unwanted reflections.
How Do I Know if My Microphone Needs Phantom Power?
To know if our microphone needs phantom power, we’ll check the type: condensers require it, while dynamics don’t. Let’s explore our mic’s specs together, ensuring we avoid any potential pitfalls in our recording journey.
Can I Use a USB Microphone for Home Recording?
We can definitely use a USB microphone for home recording; it offers convenience and studio-quality sound. Yet, we must consider its limitations, like noise proximity and expandability. Balancing benefits and drawbacks is key to our success.
What Are Common Mistakes When Setting up Studio Monitors?
When we consider common mistakes with studio monitors, let’s remember proper monitor placement and acoustic treatment. Aligning monitors correctly and treating room acoustics can greatly enhance our sound experience and improve our mixing results together.
How Often Should I Replace My Studio Cables?
We’ve all experienced that moment when sound quality dips—like a wilting flower. Proper cable maintenance is key; let’s plan to replace our cables every 5–10 years, ensuring our musical blooms thrive beautifully together.